Makeup Looking Heavy? A Guide to Melasma Coverage, Hooded Eyes and Lip Definition for Mature Skin
By URITRIP

If you want to cover melasma but each extra layer of cushion foundation makes the lines around your eyes and mouth more noticeable, start by checking whether you are applying the same amount everywhere. With makeup for mature skin, coverage is only part of the picture. What matters is where to add color and where to use less product. A practical starting point is to correct uneven tone only where needed, then shape your eye and lip makeup around how your face looks with your eyes open and your expression relaxed.
Brighter-looking skin does not always call for lighter foundation
When your complexion looks dull, it is tempting to reach for a lighter base. But your natural skin tone, brown patches of melasma, and shadows around the mouth are different concerns. Simply going lighter may leave some areas looking chalky while the discoloration you wanted to cover still shows through.
When choosing a shade, look beyond the center of your face and check your jawline and neck as well. If your face is noticeably darker than the rest of your skin, you can adjust the shade within a range that still blends naturally with your body. That does not mean everyone should go one shade lighter. Testing along the jawline to see whether the product creates a visible boundary between your face and neck is more useful than relying on shade names or numbers alone.
It also helps to separate the job of evening out your overall complexion from the job of covering small areas of discoloration. Foundation or a cushion can smooth out the broader canvas, while concealer targets the patches that remain. Keeping those roles separate can stop you from building up product on your forehead and nose just to cover melasma on one cheek.
Having more than one shade can be useful, but buying a second product does not have to be your first step. Apply a thin layer of the base you already own, then look at the discoloration that is still visible. That makes it easier to tell whether you need more coverage or a little color correction.
For melasma and dark spots, consider both color and size
A brown patch of melasma and a blue or gray cast on the chin are not necessarily the same problem. If lighter areas of skin sit alongside darker patches, the contrast between them matters too. Areas that have lost pigment, as with vitiligo, should not be treated as ordinary melasma or corrected using the same approach by default. If a change in skin color is new or evolving, have a dermatologist assess the cause separately from your makeup routine.
When applying makeup, check whether the covered area blends with the surrounding skin rather than automatically choosing a lighter concealer. For a small spot, start with a small brush, place color directly on the spot, and gently soften the outer edge. For a larger patch, work in small amounts from the darkest areas, keeping the product from spreading farther than necessary. Repeatedly rubbing the center can move the coverage you have already placed, so pause and check before adding more.
If a blue or gray cast still shows through your base, you could test a tiny amount of a warm corrector, such as peach or orange. This is not a rule to apply red-toned makeup to every brown patch of melasma. The right shade and intensity depend on your skin tone and the color of the discoloration. The wrong choice can leave you with a reddish patch that needs another layer of coverage. Try a thin layer on a small area, blend a skin-toned base over it, and compare the result with the surrounding skin.
The more useful question is not whether every trace of discoloration has disappeared, but whether the corrected area now looks like a different patch of discoloration. Trying to erase a single spot at close range can make it easy to lose sight of your overall skin texture. If the contrast looks softer from about an arm's length away, it is fine to move on.
Makeup coverage and skin care serve different purposes. Apply sunscreen before makeup. If melasma is a concern, look for broad-spectrum UVA and UVB protection, SPF 30 or higher, and a water-resistant formula. Reapply at least every two hours outdoors. Visible light can also worsen melasma, so a tinted sunscreen containing iron oxides may be an option. A tinted cushion foundation should not be assumed to provide the same protection.
Use what is left on the puff around the eyes and smile lines

If makeup tends to settle into lines, check how much you load onto the puff and the order in which you apply it before changing products. Saturating the whole puff may work over the broad area of a cheek, but it makes it harder to control the amount around the eyes or beside the nose.
Pick up cushion foundation on just part of the puff, then distribute it evenly on the product's designated dispensing surface or a clean palette. Start on a broader area, such as the cheeks, and blend inward. Finish around the eyes and nasolabial folds with the small amount left on the puff. To blend toward the neck, spread the remaining product lightly along the jawline rather than loading up again.
The aim is to control how much makeup sits in areas that crease. It will not erase wrinkles. Open your eyes and smile; if product gathers along a line, gently tidy it with a clean section of the puff instead of adding more coverage. Check how the makeup looks when your face moves, as well as how smooth it looks immediately after application.
You do not need to press the same amount of powder over your entire face, either. Start with a little where you want to control shine or smudging, and use less on areas that already look dry or textured. A softly luminous powder may be worth considering if you want a glow while controlling oil, but check how much its shimmer or sheen emphasizes your skin texture.
Check makeup for hooded or downturned eyes with your eyes open
A line that looks lovely with your eyes closed can disappear into a fold when you open them. To define eyes affected by drooping lids, look straight ahead with your eyes open and check how much color is actually visible. Any lifting effect here is a visual effect created by color and line.
Start with a short line close to the lashes rather than making it thick and long from the outset. Open your eyes, then adjust the direction at the outer corner. If your hand feels unsteady, you can use a clean puff to support it. A little dark eyeshadow over the liner can soften the transition between the line and the lid so the result looks less harsh.
Do not use the eyelid crease as your only guide for where eyeshadow should stop. Check the visible shape with your eyes open as you gradually refine the outer edge. If the color spreads in a direction you do not want, tidy the boundary with a cotton swab. Building up shadow with your eyes closed can make it easy to miss the shape people actually see.
If you wear glasses, put them on partway through. The space between the frames and your eyes, and the areas the frames cover, can affect the liner length and shadow placement that work for you. Adjusting your makeup to how you usually look is more useful than judging it only with your glasses off at the dressing table.
On a day when you emphasize your eyes, start by softly filling only the sparse areas of your brows. Strongly filled brows can add another set of bold lines around the eyes and make the overall effect feel heavy. The key is to keep definition while choosing where you want the emphasis.
To make the space above the lip look shorter, start at the upper lip's center
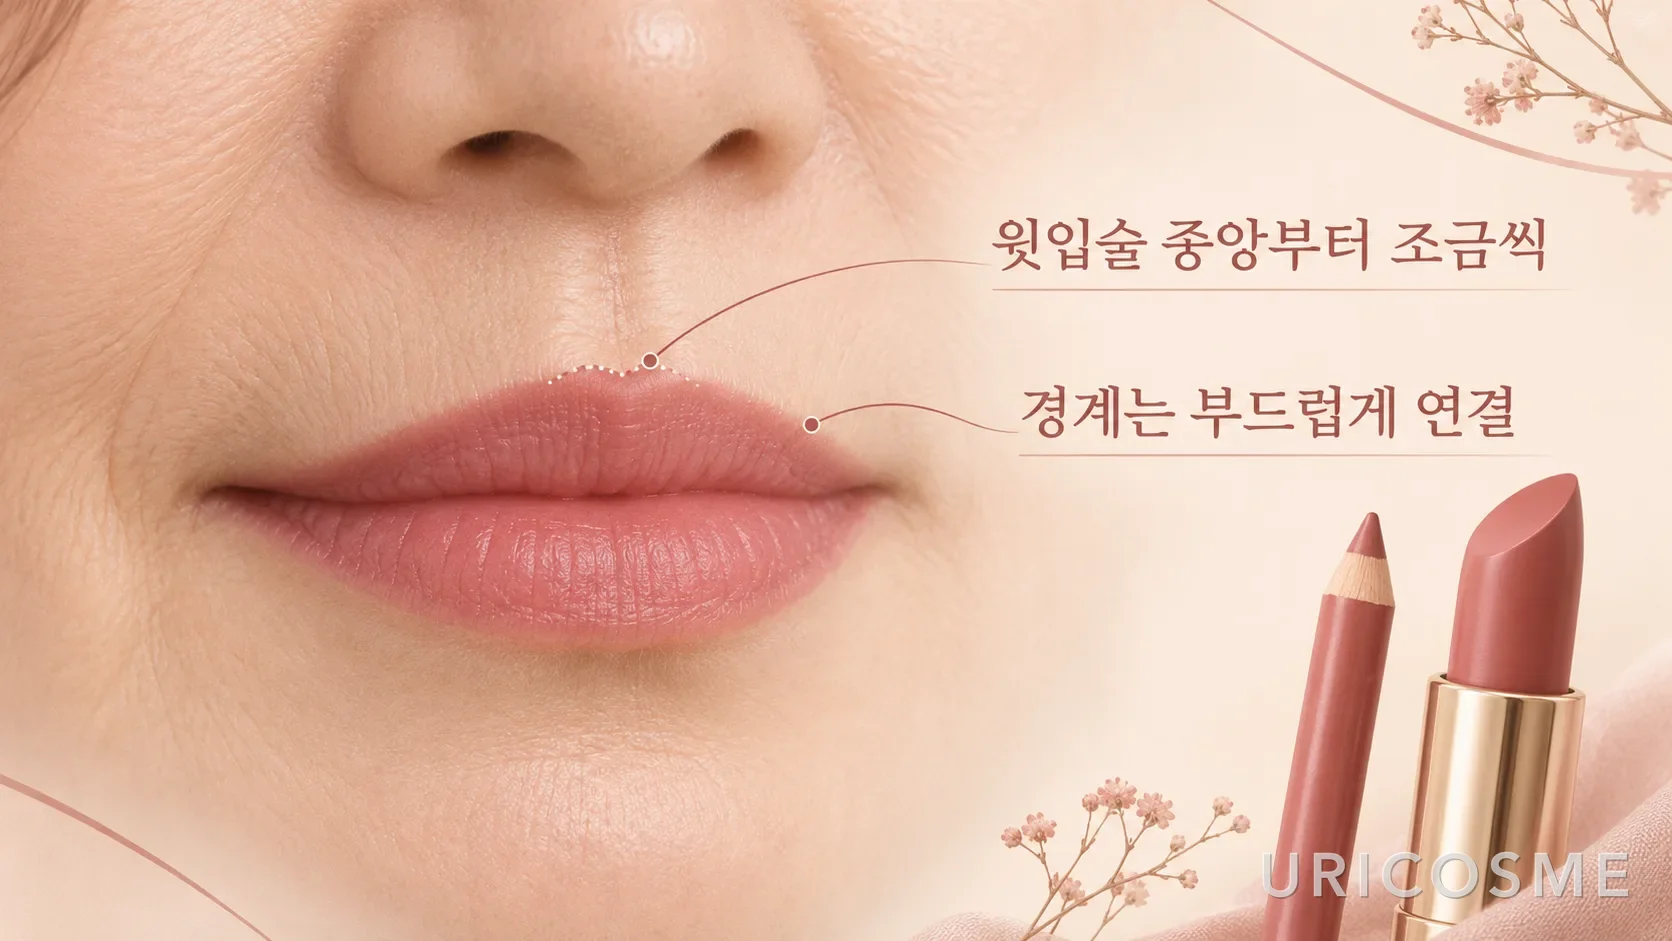
If the space between your nose and upper lip looks long, overlining the entire mouth may simply draw attention to larger-looking lips. To adjust that visual proportion, begin with the center of the upper lip, closest to the nose. See how far you can gently extend that edge while keeping it connected to your natural lip shape.
Choose a lip pencil close to your natural lip color, extend the center very slightly, and blend it into your existing outline. This is easier to tailor to your own lip shape than drawing the same distance beyond the entire border. Carry some color inward so the pencil does not sit as a separate line, then add a thin layer of lipstick to soften the transition.
If you also want to adjust the direction of the corners, begin with a short line and check it from the front. Extending a dark pencil too far can look like a shadow or smudge. Softening the ends with a cotton swab matters as much as adding color. It helps to treat refining the center of the upper lip and adjusting the corners as two separate steps.
For beginners, heavy contouring along the philtrum—the groove between the nose and upper lip—would not be my first suggestion. A visible dark line can make the area look untidy. Start by refining the lip line alone. If you add highlighter, test a very small amount along the upper lip border. For gloss, try a little at the center rather than coating the whole mouth heavily. These techniques change the apparent proportions; they do not change the actual length of the philtrum.
Blush and contour do not all need to be intense
If your face looks a little flat after evening out your base, you do not need to add strong color to your cheeks and jaw straight away. When your eyes are the focus, softer tones on the cheeks and lips can help bring the overall look together. On a day with lighter eye makeup, you can give either your lips or your blush a little more color.
Place a small amount of blush where you want it, then gradually adjust the area instead of sweeping it widely from the start. If you use contour, check that the border where it meets your blush does not form a visible stripe. When warm cheek color and shadow tones remain as separate bands, their edges can draw more attention than your even-looking base. Judge how the colors flow across your own face rather than relying on a placement that supposedly makes everyone look younger.
You may come across tips about using eyeshadow on the cheeks or blush on the lips, but only use a product on the areas specified on its label. Similar colors do not make all cosmetics interchangeable.
To begin, choose whichever concern matters most to you: controlling the amount of cushion foundation, checking your eye makeup with your eyes open, or subtly refining the center of your upper lip. Changing everything at once makes it harder to tell what works. Compare your coverage close up with how your face looks from a normal distance, and finish when the two feel naturally consistent.